Introduction
This topic will introduce you REYAX RYS8830/8833 GNSS (Global Navigation Satellite System) antenna module which is now self-claimed as one of the smallest GNSS modules in the world.
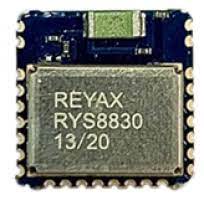
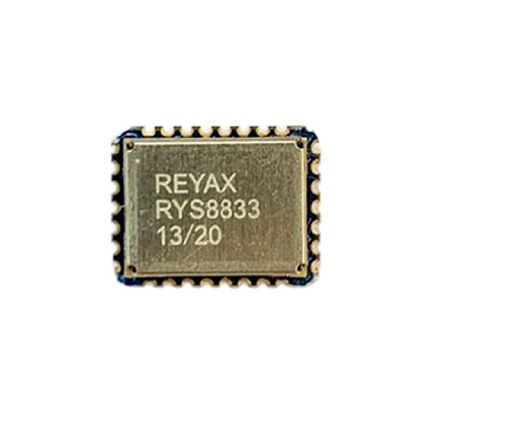
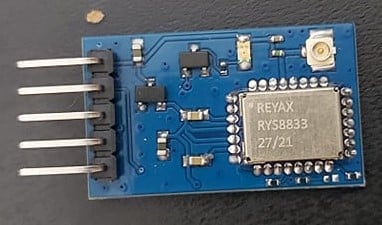
REYAX RYS8830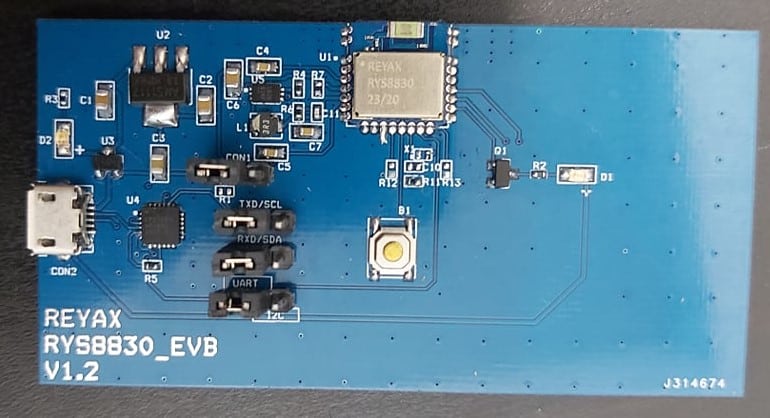
REYAX RYS8830 EVB
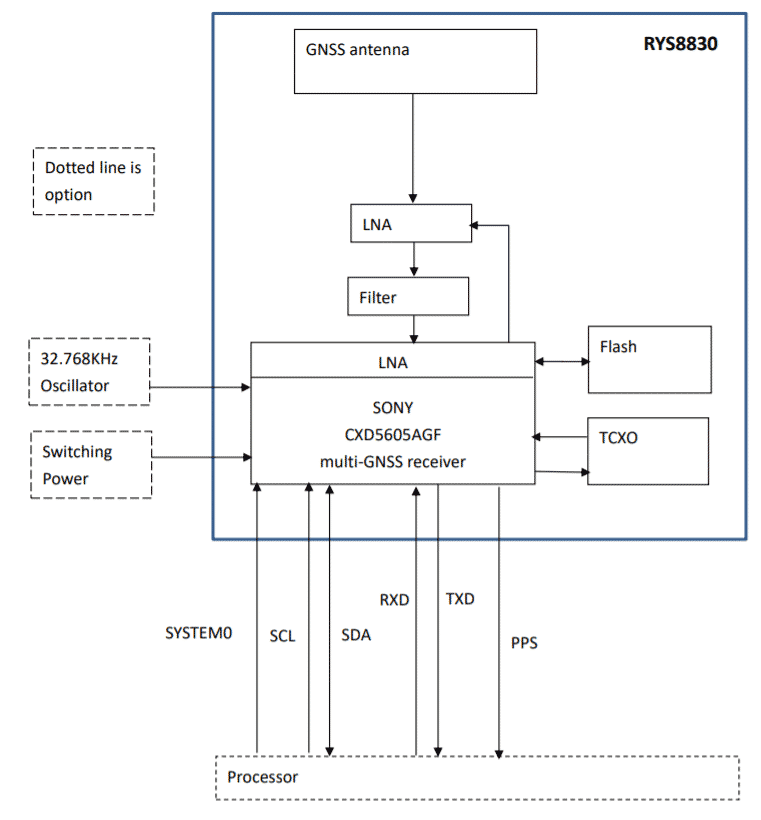
According to RYS8830’s product description, it is built on the high performance of the SONY CXD5605GF, D5605AGF GNSS engine. The RYS8830 modules utilize concurrent reception of GNSS systems offering high sensitivity in a small SMD form factor.
Obviously, expected applications with RYS8830 are mainly outdoors, including wearable devices (medical and sports) and trackers (individuals, vehicles and pets). On the other hand, its small size and low power-consumption enables even more possibilities, such as to be integrated on drones for agriculture.
Its highlighted features are as below:
- SONY CXD5603GF CXD5605AGF multi-GNSS receiver for GPS, GLONASS, SBAS, QZSS, BeiDou and Galileo
- Small SMD form factor 121mm^2
- Enhanced GNSS Filter and Low Noise Amplifier
- Ultra-low power consumption
- Up to Position accuracy 1.0 m CEP
- Embedded Antenna (optional external antenna)
In this topic, we will show you how to read RYS8830’s data with GNSS monitor software and use an Arduino to do the same thing through the UART interface.
Software / Hardware setup
Here are the things you will need for complete this topic:
- REYAX RYS8830 GNSS module, 1
- Arduino Uno dev board, 1
- Micro-USB cable, 1 (connecting the module to the PC in [Read GNSS data with GNSS monitor software] section)
- Jumper wires (connecting the module to the Arduino in [Read GNSS data with Arduino] section), several
- PC/laptop (with Windows OS) to run the Arduino IDE, 1
■ GNSS Monitor software
Read GNSS data with GNSS monitor software
We first use the GNSS monitor software to read RYS8803’s data directly. Please follow the steps below and check the video:
Notice: This topic is a quick starter guide of RYS8830, please refer to its main page for detailed information
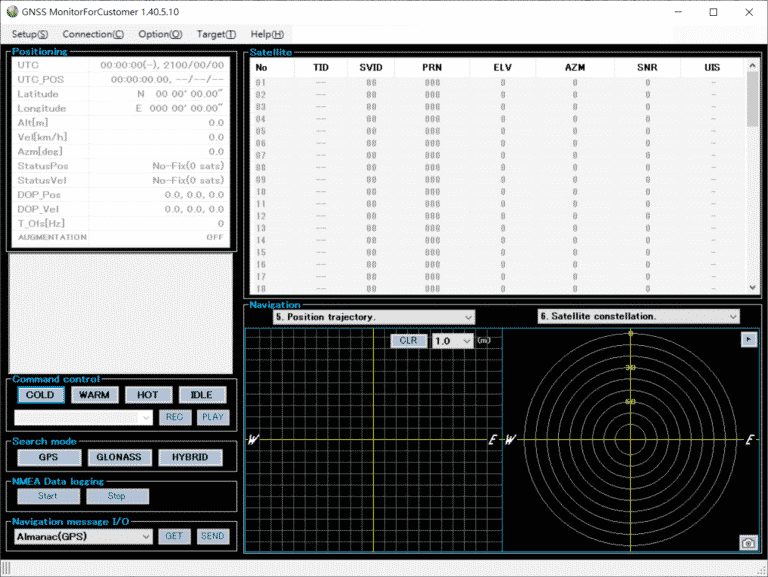
1. Download the GNSS MonitorForCustomer
Download the GNSS MonitorForCustomer software, then unzip it and install with the default settings. The initial screen is as shown below:
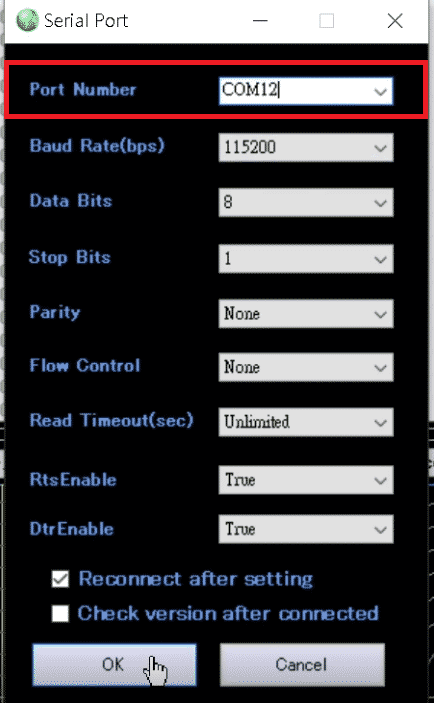
2. Set the Serial port
Connect your RYS8830 to the PC with a micro-USB cable, it should be recognized by your PC as a serial device and be assigned a COM port. Then on the top-left corner of the GNSS software, select Setup ➔ Serial Port, and set the correct Port Number of your RYS8830 in the prompt window.
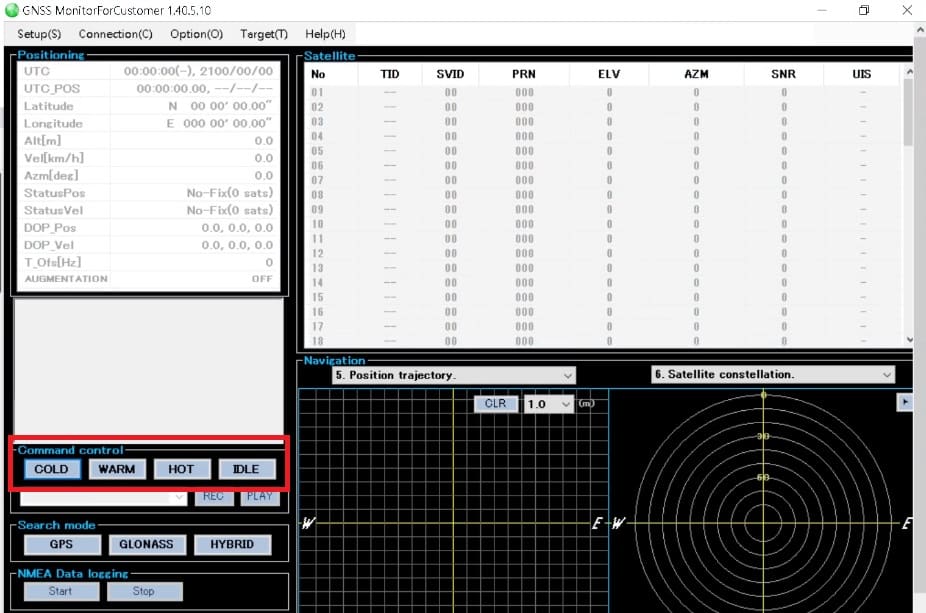
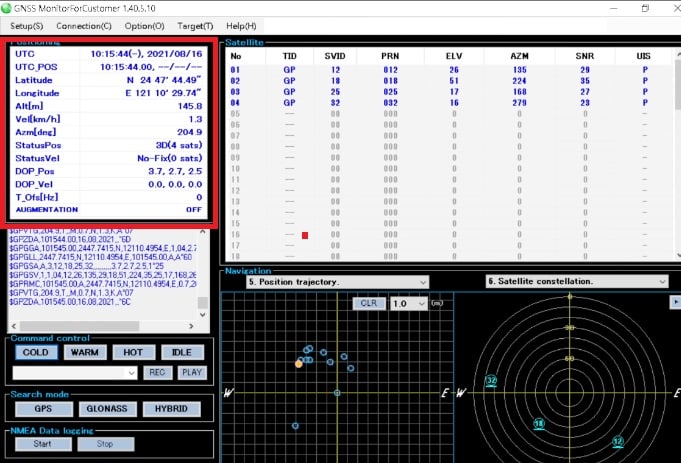
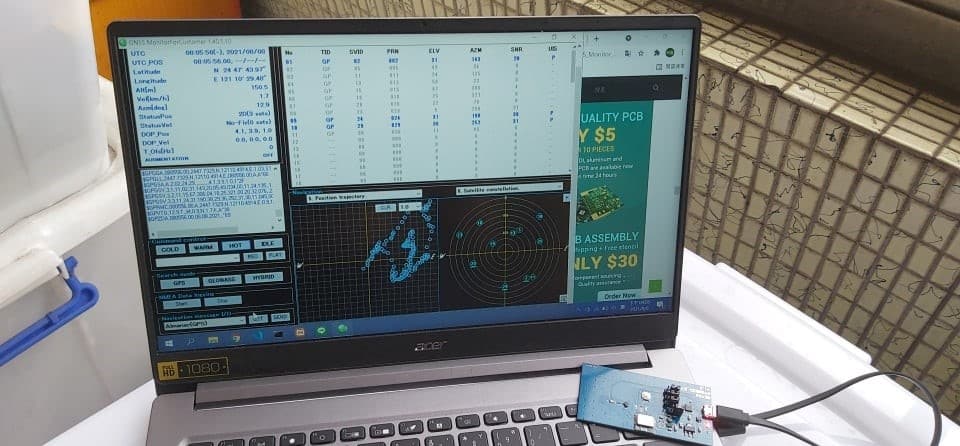
3. Cold start
Click [COLD] on the left-bottom corner to start communicating with your RYS8830. The module will start to locate the satellite signal and show the satellites available on the screen. Depends on your physical location, the current time and location data will be displayed in several minutes, as shown in figure below. However, if you cannot retrieve the data after a certain of time (e.g. 20 minutes), you may move the system to another location and try again. I’ve done my work by the window and get the GNSS data in about 8 minutes. Well, just try!
Read GNSS data with Arduino
If you want to integrate GNSS positioning function into your embedded project, RYS8830 can be easily connected to popular MCU board (e.g. Arduino, ESP) through TX/RX pins. Please refer to the Block diagram below to connect your RYS8830 to your board. In this topic, we will use Arduino Uno since it is a very popular dev board for beginners and has rich resources supported.
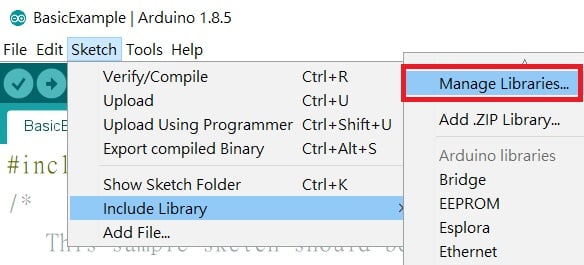
Download and open Arduino IDE 1.8. In Arduino IDE, open Library Manager (Sketch ➔ Include Library ➔ Manage Libraries…) and search “tinygpsplus” in the search bar, then install the TinyGPSPLUS library.
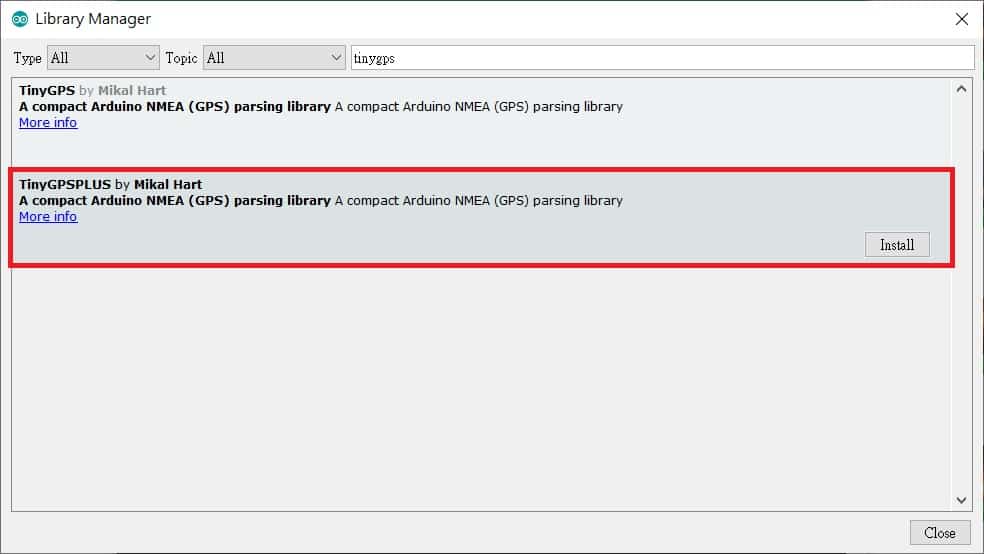
After the library is installed, please open the example from File ➔ Examples ➔ TinyGPSPLUS ➔ BasicExamples.ino
Compile and upload the example sketch to your Arduino board, you should see the location data (e.g. latitude, longitude and timestamp) printed in the serial monitor after the RYS8830 has located the satellite signal. Please double check the software setting and hardware connection if it’s not working, or use the GNSS monitor software to check the signal condition of your location.
#include <TinyGPSPlus.h>
/*
   This sample sketch should be the first you try out when you are testing a TinyGPSPlus
   (TinyGPSPlus) installation. In normal use, you feed TinyGPSPlus objects characters from
   a serial NMEA GPS device, but this example uses static strings for simplicity.
*/

// A sample NMEA stream.
const char *gpsStream =
  "$GPRMC,045103.000,A,3014.1984,N,09749.2872,W,0.67,161.46,030913,,,A*7C\r\n"
  "$GPGGA,045104.000,3014.1985,N,09749.2873,W,1,09,1.2,211.6,M,-22.5,M,,0000*62\r\n"
  "$GPRMC,045200.000,A,3014.3820,N,09748.9514,W,36.88,65.02,030913,,,A*77\r\n"
  "$GPGGA,045201.000,3014.3864,N,09748.9411,W,1,10,1.2,200.8,M,-22.5,M,,0000*6C\r\n"
  "$GPRMC,045251.000,A,3014.4275,N,09749.0626,W,0.51,217.94,030913,,,A*7D\r\n"
  "$GPGGA,045252.000,3014.4273,N,09749.0628,W,1,09,1.3,206.9,M,-22.5,M,,0000*6F\r\n";

// The TinyGPSPlus object
TinyGPSPlus gps;

void setup()
{
 Serial.begin(115200);
 Serial.println(F("BasicExample.ino"));
 Serial.println(F("Basic demonstration of TinyGPSPlus (no device needed)"));
 Serial.print(F("Testing TinyGPSPlus library v. ")); Serial.println(TinyGPSPlus::libraryVersion());
 Serial.println(F("by Mikal Hart"));
 Serial.println();

 while (*gpsStream)
   if (gps.encode(*gpsStream++))
     displayInfo();

 Serial.println();
 Serial.println(F("Done."));
}

void loop()
{
}

void displayInfo()
{
  Serial.print(F("Location: "));
  if (gps.location.isValid())
  {
    Serial.print(gps.location.lat(), 6);
    Serial.print(F(","));
    Serial.print(gps.location.lng(), 6);
  }
  else
  {
    Serial.print(F("INVALID"));
  }

  Serial.print(F(" Date/Time: "));
  if (gps.date.isValid())
  {
   Serial.print(gps.date.month());
   Serial.print(F("/"));
   Serial.print(gps.date.day());
   Serial.print(F("/"));
   Serial.print(gps.date.year());
  }
  else
  {
    Serial.print(F("INVALID"));
  }

  Serial.print(F(" "));
  if (gps.time.isValid())
  {
    if (gps.time.hour() < 10) Serial.print(F("0"));
    Serial.print(gps.time.hour());
    Serial.print(F(":"));
    if (gps.time.minute() < 10) Serial.print(F("0"));
    Serial.print(gps.time.minute());
    Serial.print(F(":"));
    if (gps.time.second() < 10) Serial.print(F("0"));
    Serial.print(gps.time.second());
    Serial.print(F("."));
    if (gps.time.centisecond() < 10) Serial.print(F("0"));
    Serial.print(gps.time.centisecond());
  }
  else
  {
    Serial.print(F("INVALID"));
  }

  Serial.println();
}
Challenge in 5 minutes
1. Get an LCD or OLED display module, try to show your RYS8830 GPS readings on the display.
Detailed specification of RYS8830
- Power Supply Voltage (VDD): 1.8V
- Idle Current (Waiting for command): 3 mA
- I2C clock: 400kHz
- Address length: 7 bits
- Slave address: 0x24
- Default Baud Rate:115200bps
- GNSS Center Frequency:
■ BeiDou(1561.098MHz)
■ GPS(1575.42MHZ)
■ Glonass(1602.5625MHZ) - Accuracy: 1m
- Cold starts: 35s
- Hot starts: 1s
- Tracking Sensitivity: -161dBm
- Hot starts Sensitivity: -160dBm
- Cold starts Sensitivity: -147dBm
- Operating Temperature: -40~85˚C
- Dimensions:11mm*11mm*2.2mm
- Weight: 0.43g
More examples you can try
More examples you can try
More info
● TECHDesign website
● REYAX RYS8830 official page
● REYAX Datasheet
● Antony Cartwright’s GNSS/GPS logger tutorial
● Michael Schoeffler’s excellent resource about RYS8830 !
Author
Dr. David Tseng, CAVEDU Education, MIT CSAIL Visiting Scientist.
![[RYS8833_Lite] Ultra Low Power 1.8V GNSS Module (DIP Version)](/web/image/product.template/51299/image_512/%5BRYS8833_Lite%5D%20Ultra%20Low%20Power%201.8V%20GNSS%20Module%20%28DIP%20Version%29?unique=539c3a4)