In the past we have showed how to deploy a The Things Network (TTN) LoRa gateway with balena, and how to build an outdoor TTN LoRa gateway with balenaFin. In this blogpost, you will learn how to deploy a The Things Network (TTN) v2 and The Things Stack v3 LoRaWAN gateway running the newest Semtech Packet Forward protocol, the LoRa Basics™ Station.

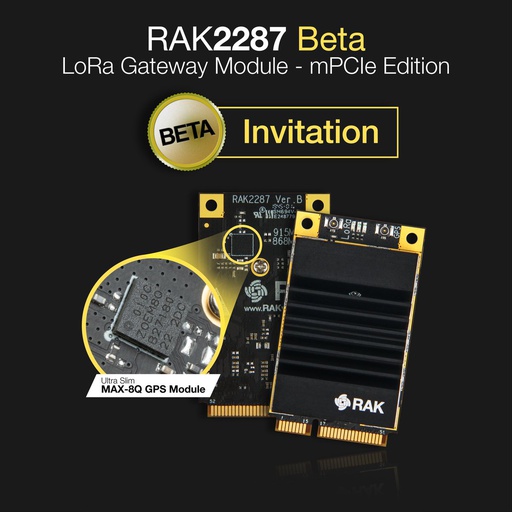
This project runs on a Raspberry Pi or balenaFin with either SX1301 or SX1302 LoRa concentrators (e.g RAK2245 or RAK2287), in just one click. The Basics Station protocol equips LoRa gateways with a reliable and secure communication between the gateway and the cloud.
Nowadays, most of the LoRaWAN operators are adopting the LoRa Basics Station Packet Forward protocol as the new standard protocol on their gateways and cloud services. Furthermore, at the end of the blogpost you will find how to deploy a LoRa Basics™ Station gateway at The Things Industries, the professional side of TTN, with some minor changes.
Contents
- Before you start
- Tutorial
- Until next time
Introduction
LoRa is a long-range wide-area network technology, like cellular networks, but designed for lower energy consumption. It enables devices to send small amounts of data over long distances, for years, running on a small battery. The LoRa signal is received by gateways to offer coverage to specific areas, and the range of the LoRa gateways is 8-10km (5-6 miles) in rural areas and 1km in towns where the density of buildings is greater.
The LoRa gateway software includes a Packet Forwarder software that runs on the gateway and interacts with the LoRa chip, which receives and transmits the radio frequency packets, and the LoRaWAN network servers (LNS), which transmits the messages received from the LoRa chips to applications and from the cloud to the devices (uplink and downlink).
Basics™ Station is the new Semtech implementation of the LoRa Packet Forwarder protocol, using Websockets (TCP) and exchanges-encrypted JSON messages between the gateway and the cloud service. You can find more information here. The older LoRa packet forwarders are the Semtech UDP Packet Forwarder and, for the The Things Network, the non-standard TTN Packet Forwarder using TCP and protocol buffers, and others. The Things Industries is currently using Basics Station packet forwarder protocol as the official protocol.
Building a The Things Network LoRaWAN gateway with balena offers several advantages, including the simplicity of installing it on raw IoT devices with just a few clicks, and the ability to manage a fleet of LoRaWAN gateways from a single dashboard. Manually upgrading the software running on the gateway can be challenging, but balena provides built-in capabilities to provision, deploy and manage everything in one place.
Hardware required
To build this project, you'll need the following:
- Raspberry Pi (we've tested this on a Pi4, Pi3 and balenaFin)
- SD card in case of the Pi
- USB-C cable to power the Pi
LoRa concentrators
SX1301
SX1302
Software setup
For the software, you'll need:
- A TTN account (sign up here)
- A free balenaCloud account (sign up here). Remember: your first ten devices are free and fully-featured!
- Software to flash an SD card e.g. balenaEtcher
- (Optional) If using CLI method, you'll need the project code
Once you have created your balenaCloud account, click the Deploy with balena button below to automatically deploy the application. If you use this one-click approach, you can skip the manual step of adding device environment values later because they’ll be pre-configured for you:

If you’re already familiar with balenaCloud, or want more control of how you create and deploy an app to balenaCloud, you can also code with the CLI. Get the project code from this repo.
Tutorial
Create the Application and add a device
Clicking the deploy button will create an application with all the necessary code to deploy your Basics Station LoRa gateway.

Select your board as a device type and click the button ‘Create and deploy’.
At this point, balenaCloud will automatically pull all the code from the Basics Station GitHub repository to your application, and deploy the containerized service.

Once your application has been created, you can add a device to that new application by clicking the Add device button. When you add a device, you specify your device type. It is important that the type you choose matches the device you configured for your application. If you are going to connect your gateway to a wireless network, be sure to set your WiFi SSID and password here, too.

This process creates a customized balenaOS image configured for your application and device type and includes your network settings if you specified them. When prompted, download the file to your workstation.
Flashing the LoRa gateway and deploying code
Once the balenaOS image has been downloaded, it’s time to flash your SD card (in case you use a Raspberry Pi).
You can use balenaEtcher for this. If the downloaded image file has a .zip extension, there’s no need to uncompress it before using balenaEtcher.

Once the flashing process has completed, insert your SD card into the Raspberry Pi and connect the power supply.
When the device boots for the first time, it connects to your network automatically and then to the balenaCloud dashboard. After a few moments, you’ll see the newly provisioned device listed as online.
When the device appears online in the dashboard, it will automatically start to download the LoRa Basics™ Station application.
Define your MODEL, REGION and TTN VERSION with Device Variables
This application is compatible with different LoRa concentrators, the SX1301 (e.g. RAK2245) and the new SX1302 (e.g. RAK2287).
In case that your LoRa concentrator is a RAK2287, it's important to change the Device Variable with the correct MODEL to SX1302. The default MODEL on the balena Application is the SX1301.
To change Device Variables:
- Go to balenaCloud dashboard and get into your LoRa gateway device site.
- Click "Device Variables" button on the left menu and change the
MODELvariable toSX1302.
That enables a fleet of LoRa gateways with both SX1301 and SX1302 together under the same app.
Next step is defining the TTN version with the TTN_STACK_VERSION variable. The default version (at the moment) is 2 but you can change it to 3.
And before starting, the gateway is configured with European frequency (868Mhz). If you live in another LoRaWAN region, feel free to change the TTN_REGION variable with another region. If you are going to use TTN_STACK_VERSION 3 you will need to use the TTN_REGION eu1.
Finally, if you don't want to redirect your data to TTN or The Things Stack you can override the variable TC_URI wit your own LNS URL.
Device Variables that can be changed now:
GW_GPShas been set to false. Change the value totrueif you have GPS on your RAK Pi HAT. For example, both models have GPS.GW_RESET_PIN=11GW_RESET_GPIO=17MODEL=SX1301orSX1302depeding on your LoRa concentrator.TTN_STACK_VERSION=2or3TTN_REGION=euorus,in,auandeu1for European regions onTTN_STACK_VERSION=3.

If you build for the version 2, GW_ID and GW_KEY will be filled later after the registration of the Gateway on the TTN Console. If you are building for the version 3, TC_KEYwill be filled later.
After these changes, your device information screen in the dashboard should look something like this, showing the device with the basic station service running.

Before configuring the gateway on the The Things Network, it’s important to know the Ethernet MAC address in order to get the EUI from the TTN network. The EUI is the LoRa unique identifier (64 bits, 8 bytes) for gateways, which can be used to register the gateway on The Things Network. In some cases, the EUI can be the Ethernet mac address (6 bytes), which is unique, expanded with 2 more bytes (FFFE) as the standard way to increment the MAC address from 6 to 8 bytes.
The EUI appears on the dashboard as a TAG of the device. Copy the EUI TAG of the summary of your gateway on the balenaCloud. Now you are ready to register your TTN LoRa gateway.
Connecting to The Things Network V2
First, create a The Things Network account if you haven’t already by visiting this website.

Once logged in, click the “Gateways” button. And click on the “Register gateway” link.

Check “I’m using the legacy packet forwarder” checkbox on the registration form. The Things Network still does not officially support Basics Station packet forward protocol. Checking this checkbox internally makes it work. Actually, The Things Industries supports Basics™ Station packet forward protocol as the standard; you can read more below where we explain how to set up a TTI LoRa gateway with balena.
Paste the EUI (from the tag on your device's dashboard in balenaCloud) into your The Things Network console. Input all the data, and remember to introduce your frequency plan, which depends on your geographic location.
Finally, click the “Register Gateway” button. You’re now ready to set up your LoRa gateway.
Set up your LoRa gateway at The Things Network V2
When the Gateway registration is done successfully you will go automatically to the Gateway Overview page. Now it’s time to set up your new TTN LoRa gateway. From there you will be able to see the information of your LoRa gateway, which you’ll notice is already connected.

On this configuration page, there are two important keys that you need to configure the LoRa gateway on the balenaCloud dashboard: the Gateway ID and the Gateway Key. These variables are needed because each TTN LoRa gateway has its own unique key and ID. Change these variables by selecting the Device Environment Variables navigation item (on the left-side menu within an application on balenaCloud).
Once your gateway has been created, copy these variables (ID and Key) from the TTN console and go back to the balenaCloud dashboard and create two new device environment variables on the balenaCloud:
GW_ID is the EUI from the balenaCloud device status screen, and
GW_KEY it’s the Gateway Key from the TTN console.
Once you have added these variables your device will restart and then return to a running state. To check that, go to the TTN console and check if it shows connected with a green led.

Now that you have your new TTN LoRa gateway up and running, it’s time to send data from your TTN nodes. For example, you can connect temperature sensors with TTN nodes, moisture sensors from your plants and more.
Currently you have a TTN LoRa gateway providing signal to all the sensors and nodes around your gateway. Congratulations: now you are part of the crowdsourced TTN network, helping to improve the LoRa TTN coverage. It’s time to build some LoRa nodes and benefit from your own coverage. Some minutes after deploying it, my gateway was able to route 81 messages from devices.
Connecting to The Things Stack v3
After the announcement of the TTN to V3 upgrade find here how to upgrade your balena TTN gateways in a simple way. The Things Stack is the new open source solution made by The Things Industries.
Before creating the gateway on the The Things Stack console, copy the device EUI from the TAG on balenaCloud.
Go to the The Things Stack Console and log in with your TTN credentials. Then click Register a Gateway button.

Create a gateway with the EUI copied from the balenaCloud Tags section. Introduce your EUI on the Gateway EUI field.

And once the gateway is successfully created, click on the API Keys section and click Add API key. No name is needed for the API key, select Grant individual rights, check Link as Gateway to a Gateway Server and now click Create API key.

Copy the API key generated and go to the balenaCloud Device Environment Variables section. Override the variable TC_KEY.

The device will be rebooted and you will be able to see it active on the The Things Stack Console.

Connecting to The Things Industries
The Things Industries (TTI) is the professional side of The Things Network. TTI is a private service for enterprises who need to manage their own LoRaWAN network cloud service on their own premises. TTN runs in a multi-tenant solution with all the members of the community, while TTI enables enterprises to manage their own network with their own SLA paying a subscription.
The Basics™ Station packet forward protocol is the official packet forward protocol at the Things Industries, which is available as V3 at the The Things Network stack.
The goal of this tutorial is to reduce friction to The Things Industries (TTI) LoRa Gateways fleet owners (or managers) providing simple basics station LoRa gateway and enhance the upgrade over-the-air possibilities of the gateways deployed in the field providing LoRaWAN coverage.
To connect your balena LoRa gateway to The Things Industries you need a premium account at The Things Industries console.
Set up your LoRa gateway at The Things Industries
To configure your LoRa gateway, set up the previous balena installation defined above.
Once your Gateway is properly running at the balenaCloud with the TTN network variables, it’s time to register the LoRa gateway at The Things Industries console.

Go to the balenaCloud and copy the device TAG with the EUI.

Check that the EUI copied is 8 bytes (16 characters) defined as a tag. And go back to the The Things Industries console to register your LoRa gateway. Paste the EUI on the Gateway EUI field.

Once the gateway is registered go to the balenaCloud and change the Device Variables to point to the TTI network and not to the TTN network.
On the The Things Industries Gateway, the variables GW_IDand GW_KEYare not needed, so you can delete them. What is needed is to change the TC_URI to the proper websockets URL enabled by your organization. That means that your TTI organization should have set up a websockets (secure) on your server to receive the LoRaWAN packages from the gateways. Use that as TC_URI.

In some cases the certificate may change from the one used at the TTN gateway. In that case, set up the variable TC_CERT with the certificate. To check that the TTI LoRa gateway is up and running go to the TTI gateway page to analyze the Data going through the gateway.

Now the gateway is ready to receive and forward LoRaWAN packages from your sensors and nodes for your private LoRaWAN network. From here you can start introducing more gateways and manage them from balenaCloud. Remember: your first ten devices are free and fully-featured!
Until next time
We’d love to hear from you if you try this project and add more sensors. We’re always interested to see how the community puts these projects to work. Get in touch with us on our Forums, Twitter, and Instagram to show off your work or to ask questions. We’re more than happy to help.
Acknowledgements
This project is made possible by the awesome work of Jose Marcelino, RAK engineer, Xose Pérez and the balena Hardware Hackers team.